Learning the alphabet and honing gluing skills can be combined in just one fun activity. Your child will not only learn the alphabet, but also letter formation as he can trace his finger over the textured result.
Here are 10 tips on how to get your child’s alphabet learning and gluing skills going.
1. Print each alphabet on an A4 size paper
Ensure the size of the alphabet is large enough to glue materials on. Lots of free alphabet downloads are available on the internet. Choose between print or cursive, whichever your child will eventually be using.
2. Collect a wide range of material
Sometimes five to 10 minutes is all a 3-year-old will take to enjoy an activity. That’s okay, but that’s also why having different textures to work with is important to stimulate interest, encourage longer participation and avoid boredom. Tissue paper, hard card, coloured felt, sequins and scrap cloth are just a few ideas. Separate all these in different little boxes and label for easy reference.
3. Pace yourself
If your child is new to gluing, introduce only a few materials at a time. Offer perhaps two to three choices. On special days, you could bring out your whole arsenal of resources and see what he comes up with.
4. Don’t glue everyday
Eventually, your child may get tired of gluing so use stickers instead. Choose small stickers and offer a variety to make it interesting.
5. Be prepared
Make glue tubes or sticks available. Use UHU for hardy material. Have a damp cloth handy for clean-ups midway. Don’t always jump in to wipe your child’s hands though. This interferes with the fun and discourages your child from getting used to the messiness that’s a natural part of crafting.
If your child’s work table is made of wood, it helps to line it with a plastic cover to avoid from spoiling it. We like IKEA’s transparent desk pad.
6. Introduce the alphabet
If you’re teaching your child phonics, introduce the sound of the alphabet first. We’re using Jolly Phonics at home, so I start by telling a story and emphasising a few words with the letter sound.

Then I show a flashcard of the letter, pronounce the sound clearly and ask the child to follow suit.

Finally, I bring out the alphabet print out and we start glueing.
7. Encourage independence
If your child is new to gluing, start by demonstrating what needs to be done. Show how squeezing the glue tube too hard will make a mess. Show how to angle the sticky part of the material downwards and place it on the intended space. Then sit back and let your child take over, stepping in to help only if necessary.
8. Keep it relaxed and fun
Enjoying crafts is a process that takes time. From the beginning, participate with your child in a positive way and demonstrate how fun it can be. Discuss the colours you’ll be using. Feel the different textures together. Talk about how soft or hard, rough or smooth the textures are. Praise your child for every effort made. Don’t make a big deal about mess.


We’ve also used toothpicks (cut into small pieces) and semi-hard transparent plastic (saved from a discarded toy box).
Keep finished print outs in a folder so your child can trace the letters with his index finger.
9. Respect your child’s boundaries
By all means encourage your child to finish what he’s started unless he’s genuinely tired. Also be careful not to force your child to go beyond what interests him otherwise the activity may lose its appeal and he may be discouraged from trying again later.
10. End well
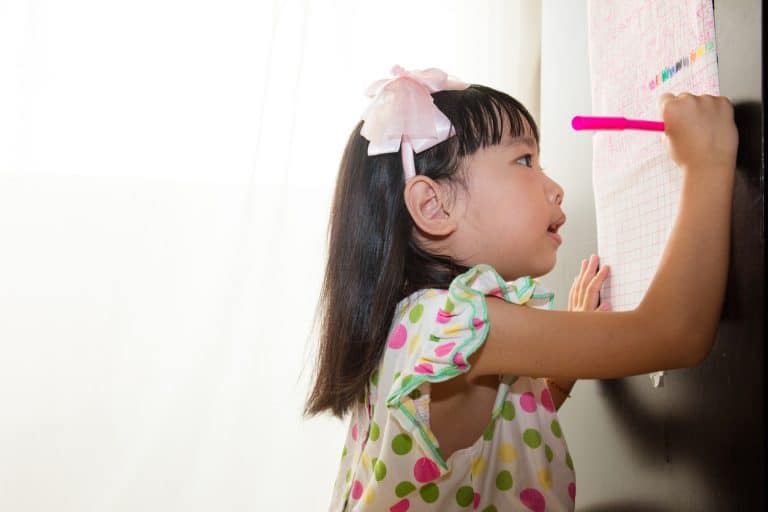
When you observe your child getting tired of the activity, start to wrap up. Usually, I say something like “Have you had enough? Right, looks like you’re done for the day. Let’s pin your work up (on our display board), pack up and do something else now, okay?” This way, the activity ends on a positive note, the child feels some pride that his work is valued and there is proper training to tidy up before moving on to the next thing.
Enjoy!
What interesting crafts have you used to teach your child the alphabet?
(Note: This post was originally published on 5 June 2013)
–
Jin Ai traded refugee work for diapers, dishes and homeschooling. She blogs about parenting, home education and life as mom to four kids at Mama Hear Me Roar.
Image Credits: Jin Ai, Flickr user twicepix